Quick notes for this project:
Maximum Texture size: 2048
Maximum foliage alpha: 512 (Dependent on how close it is to the renders)
Maximum Poly Count on any asset: 35k (dependent on alphas)
Letting the image speak for itself
Lighting: Chiaroscuro
Texel Density: Fitting for the scene
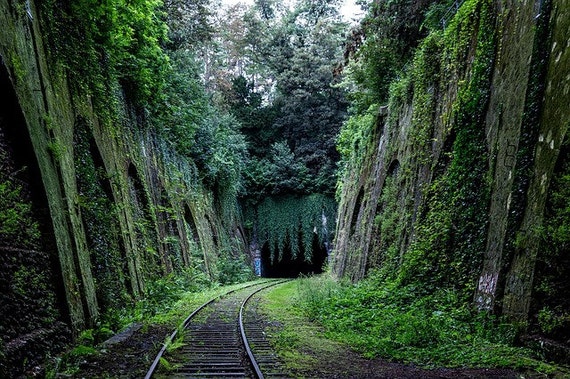
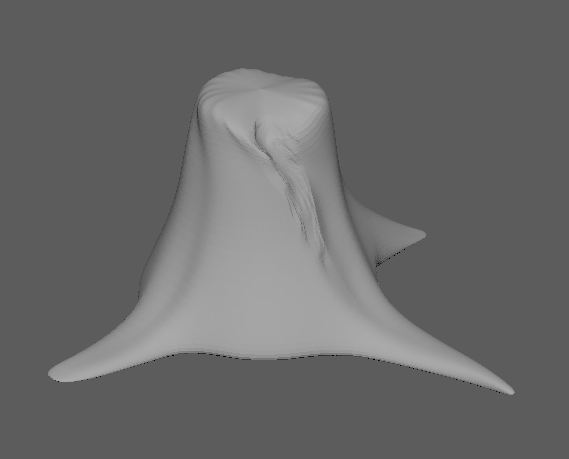
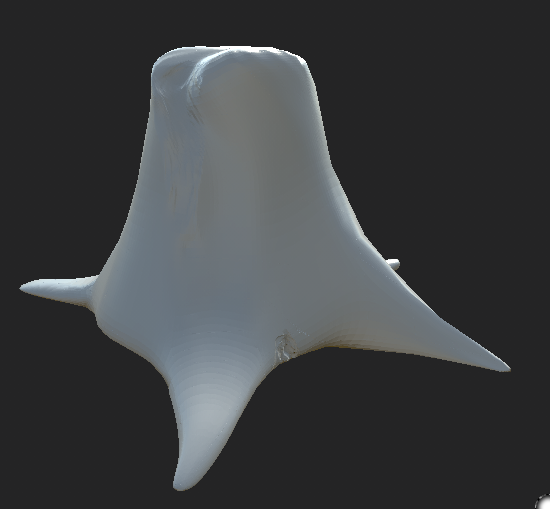
The concept behind these is to have a tunnel at the end of the railway, overgrown in forestry and plantation. The final concept will either be what was recommended to me which would be a playable scene, although this is a nice idea I believe it to be too much of a stretch goal so in turn I decided to change it to something like either a small animation start screen or a final render. Seeing as it is for my portfolio it will be the best choice. This means that there will be minimal assets but a lot of detail in the textures and alphas. I've started production as soon as possible and thought out my ideas, I believe that to achieve what I want I will need to model EVERYTHING that's including the landscape as well. I started by creating the landscape and then trying to get some easy models out of the way that would need damage added as well as being retopologized. Starting this I just done some basic models getting them ready to be put into ZBrush for the damage. After creating the base model I decided that it would be best to throw it into ZBrush and enhance it from there. This was the outcome of what I finished with in ZBrush. A very basic tree stump with organic holes and damage done to the tree stump from when it was chopped in half, not by chainsaw but by axe.
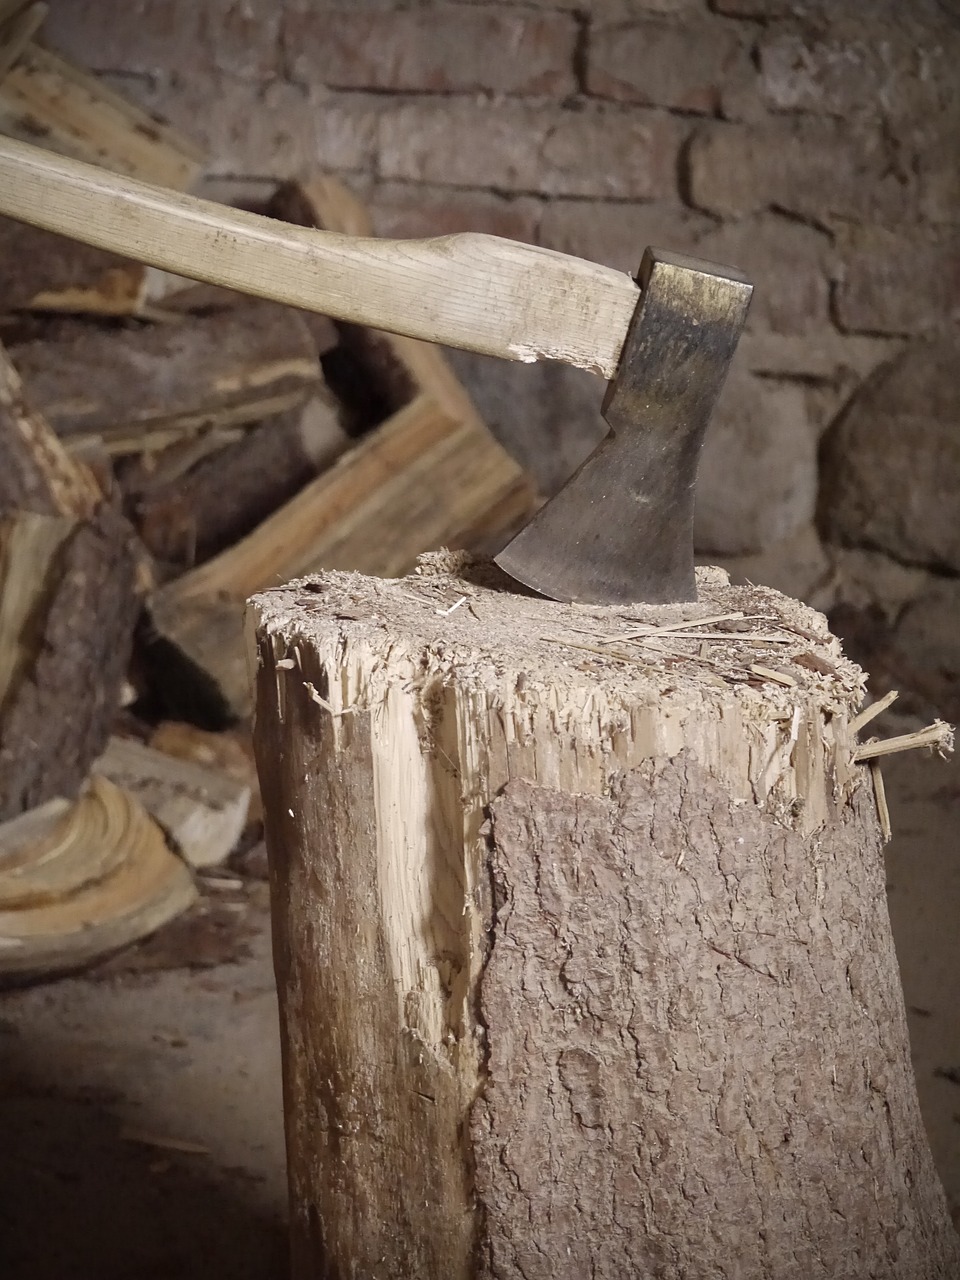
The image below is what this was referenced from aside from I wanted it to be natural so I added in what looks like roots from the base of the tree stump as well as minor bug 'trenches' shown by the second image below. A way of showing that it has been sitting there a good while as well as it has gone untreated by any human after it was chopped down. This should allow anyone with knowledge in this field to know that it's been left here for a while and that it wasn't treated creating a time frame from this one asset adding in information to my final piece.

I then went and retopologized it and made a cage so that way it can be a low-poly based asset but have the bake of a high-poly asset, allowing for the material to sit well and look HD. This asset alone along with some others created should give out a time frame of how long the forest area surrounding has been taking over. Using this story telling piece I can create a atmosphere around this one asset if someone was to look at it in detail they would know what happened to the surrounding area.
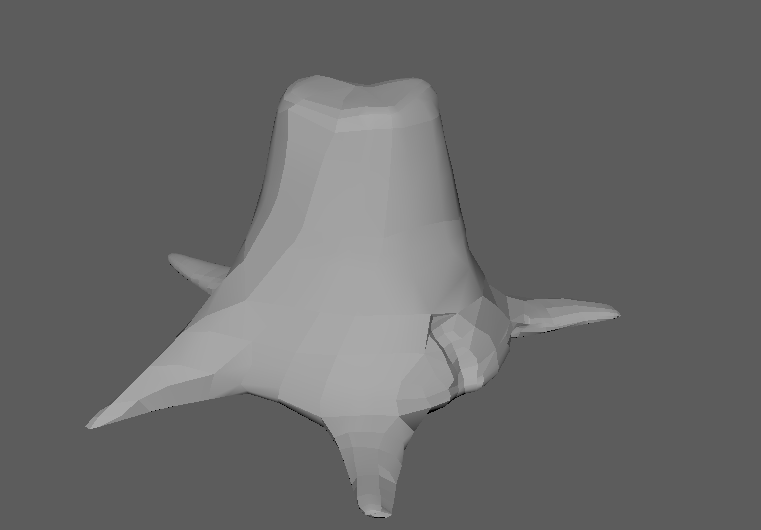
The finished bake with the cage, HP and LP shown below.
I'm yet to start texturing this asset because I'm still working on the UVs, aside from this I also wanted to start the creation of the landscape, tunnel & some of the easier smaller assets. I decided it would be easier to start creating the scene rather than worrying about one asset that would be completed easier if I gave it a break and continued it when I felt more interested. This is my normal workflow that allows me to multitask. This asset took me 55 minutes to get to this point and even though that is a VERY small time frame, I need to give myself plenty of time for any future investments.
I decided to put the environment asset in first seeing as it would be one of the easier pieces to create, creating this I looked at references from basic train tracks that rely on small indentations to keep the train 'stable' if it was to start to tip over.
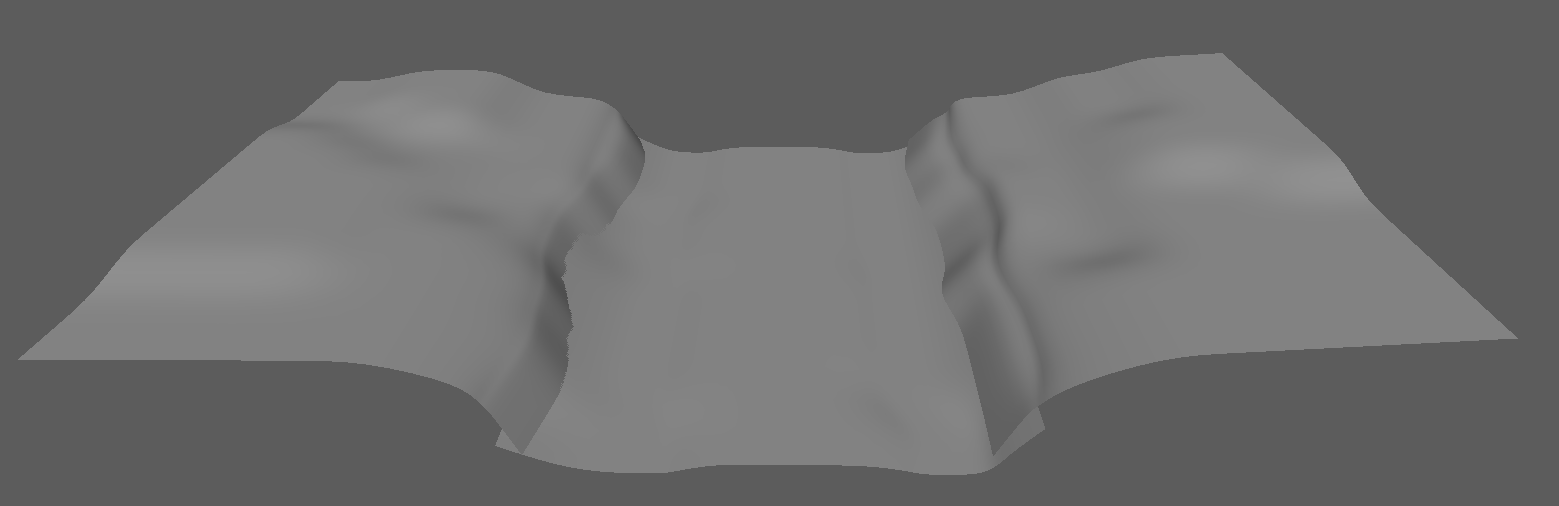
The reference image below showcases the idea that I want with the landscape, its almost the same as any 3 lane map created in most eSports. The idea behind it is so I can manipulate the human eye into a focal point, the middle lane being the most information giving therefore the focal point of the render. Having trees and other foliage on the other two lanes will help with the story telling and the overall feel of the image. This again creating the most realistic environment piece I can all the way down to the simplicity of the dirt.

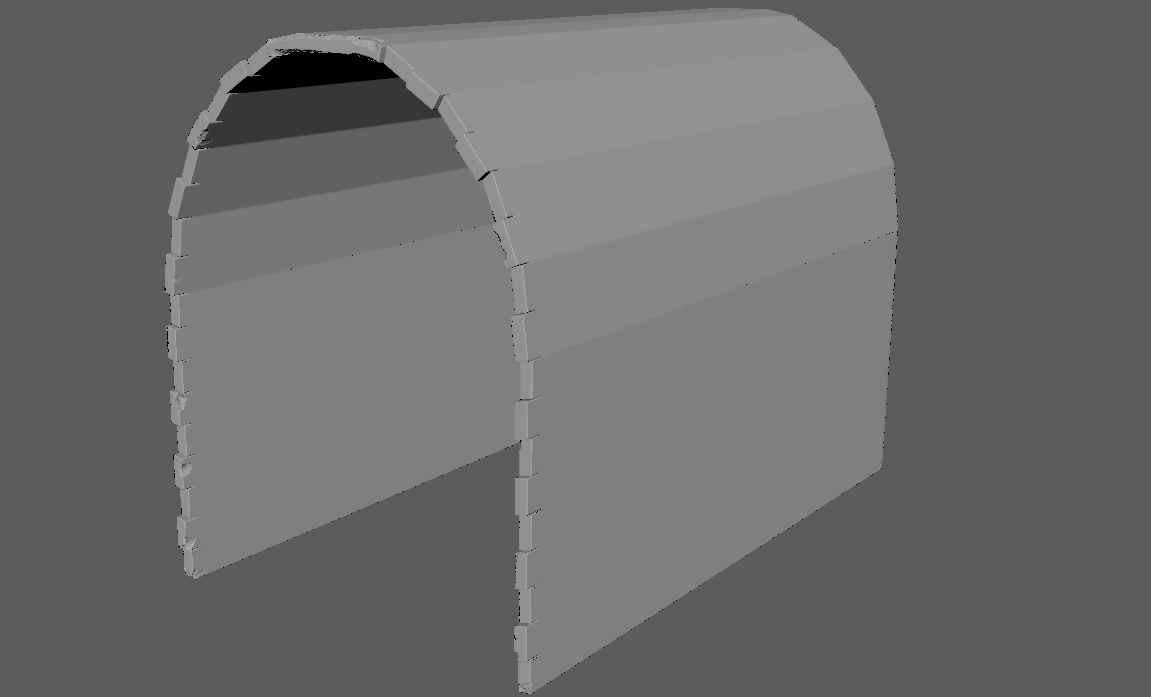
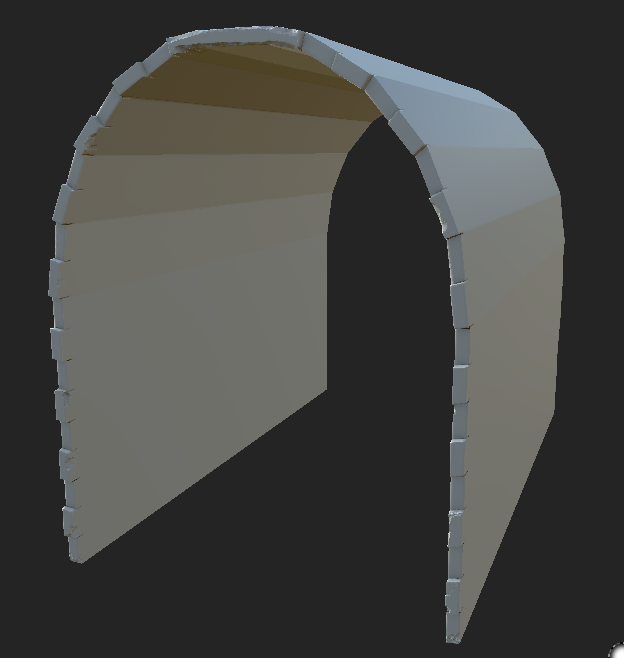
Next objective was to build the tunnel, separate from the wall so that it can be perfectly textured as well as retapologized without any issues. To start I modeled a very basic form of a tunnel, seeing as it's going to be in the distance from the actual render I thought it wont need as much detail as the rest. That being said, I wished to go for a fully textured and very nice looking render from different points so I decided to change my idea on this and go for a tunnel that has damage, nice textures as well as a nice retapology and bake. Being the same 'pipeline workflow' as the tree stump. Shown below is the process that I did.
Firstly creating the low-poly model and then throwing it into ZBrush to be able to give it damage and the marks necessary. I followed the idea of a train 'bouncing' or 'swaying' to add in the damage marks to the correct areas as well as dilapidation marks on the lower end of the bricks where water and rain would sit along with the top of the tunnel for the same reason (Not so much sitting as it would hit them). The rest of the marks are from other things such as humans, animals and even vegetation fighting back at the tunnel. Although as you can see clearly from below the whole of the tunnel isn't marked, this is because I will be adding a fog level near the entrance not allowing you to see far into the tunnel thus not needing to do any work to it keeping workflow at a maximum at all times.
After this step, same as before I went and retapologized it and made it a low-poly model with a nice bake. The reasoning for this is obvious, keeping geometry to a minimum allowing for the textures and materials to do the most of the work and not dragging down any amount of information.
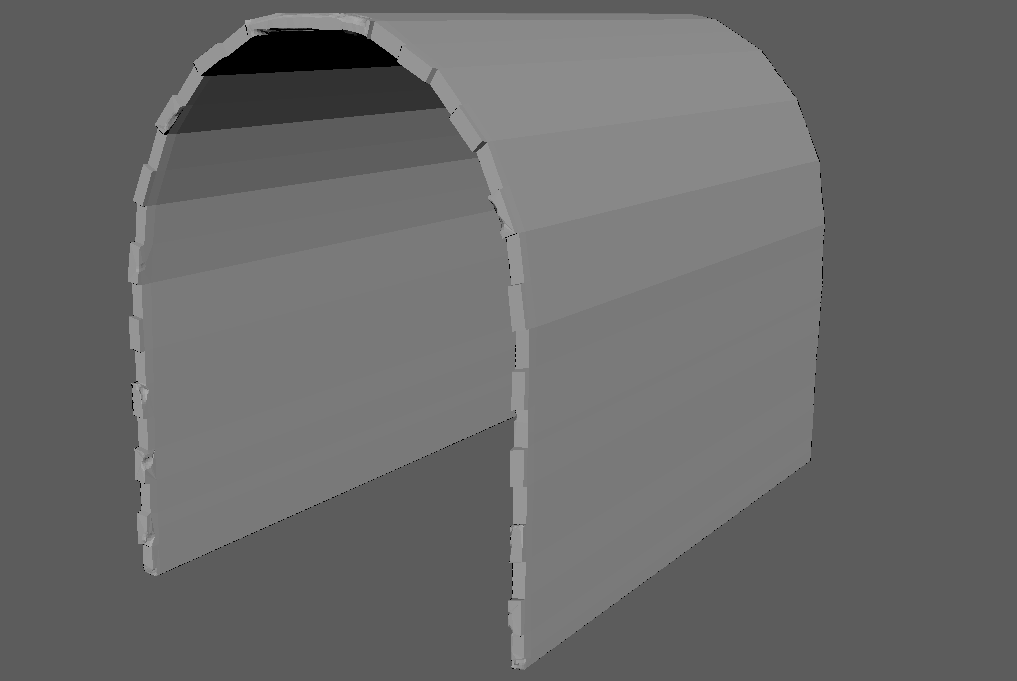
The finished bake with the cage, HP and LP shown below. (Not yet finished)
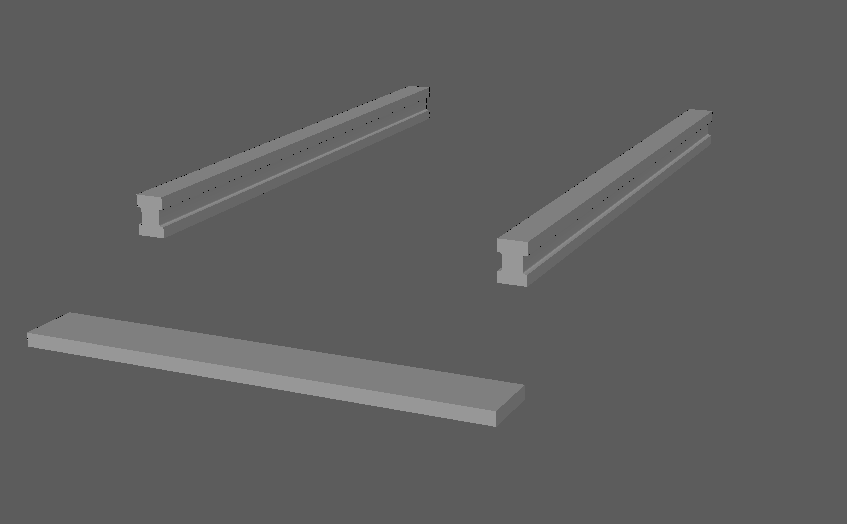
After that process again I went onto modelling more things that I thought would be in the scene and obviously I will be needing a train track. Now this is something I wouldn't normally do but I took a new and improvised approach to these parts. They will be modular assets but each piece will have its own vertex painted texture in UE4 as well as the same texture tiled across all the seperate objects. I know this is the more expensive way of doing it rather than having one massive piece and adding a tillable but I wish to make these unique in a way. I wont be using any bake on these as they are what they need to be but instead let the materials do all the talking. This is souly because I have such a short time frame to do it all in I don't want to be wasting any time.
Now for the part I love. Whenever I get bored I look back at my list of things I need to have done and accomplish by the end of this project, that includes models, textures, finished assets, alphas and more. I will leave a photo of it at the end of this post. As for now I would like to show off the textures I created so far for this project which I made when I was getting bored of modelling and messing around with all of that.
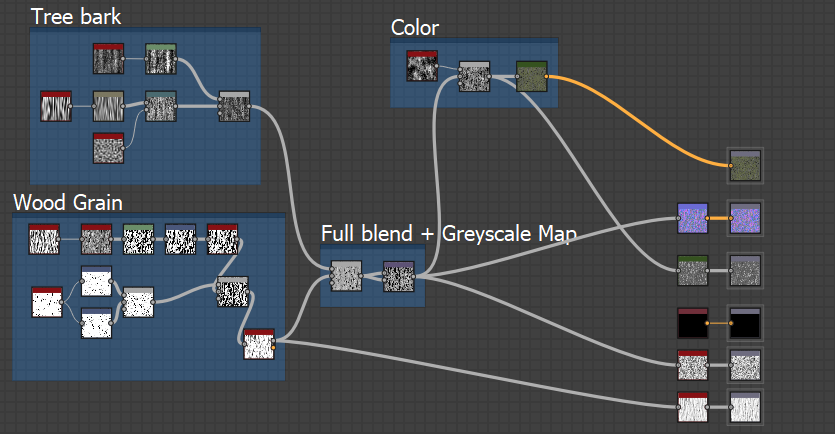
Texture 1 - Wood Bark:
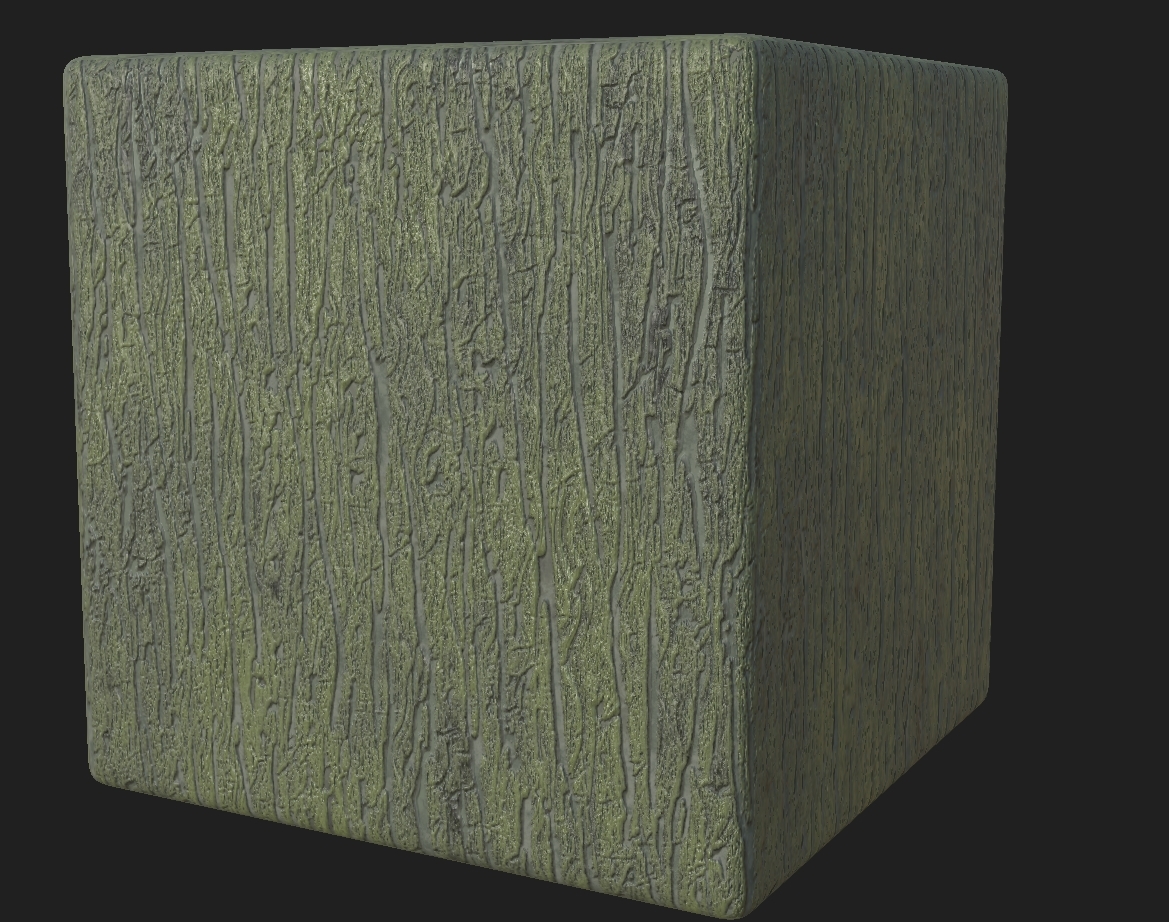
This bark was shown to me by a friend who made a much different variation of the wood but none the less I decided to ask him how he went around doing it. He said the main point is the tree indents. From this information I thought that I would concentrate fully on the indents and getting the right AO and height maps to create a fully realistic game looking piece. Here's the small graph created to show you how about I managed to get it to work (With small help from him with the base wood grain, not copied but advised and changed). A fun and simple texture which can be put onto the tree stump or any other trees to make them look realistic.
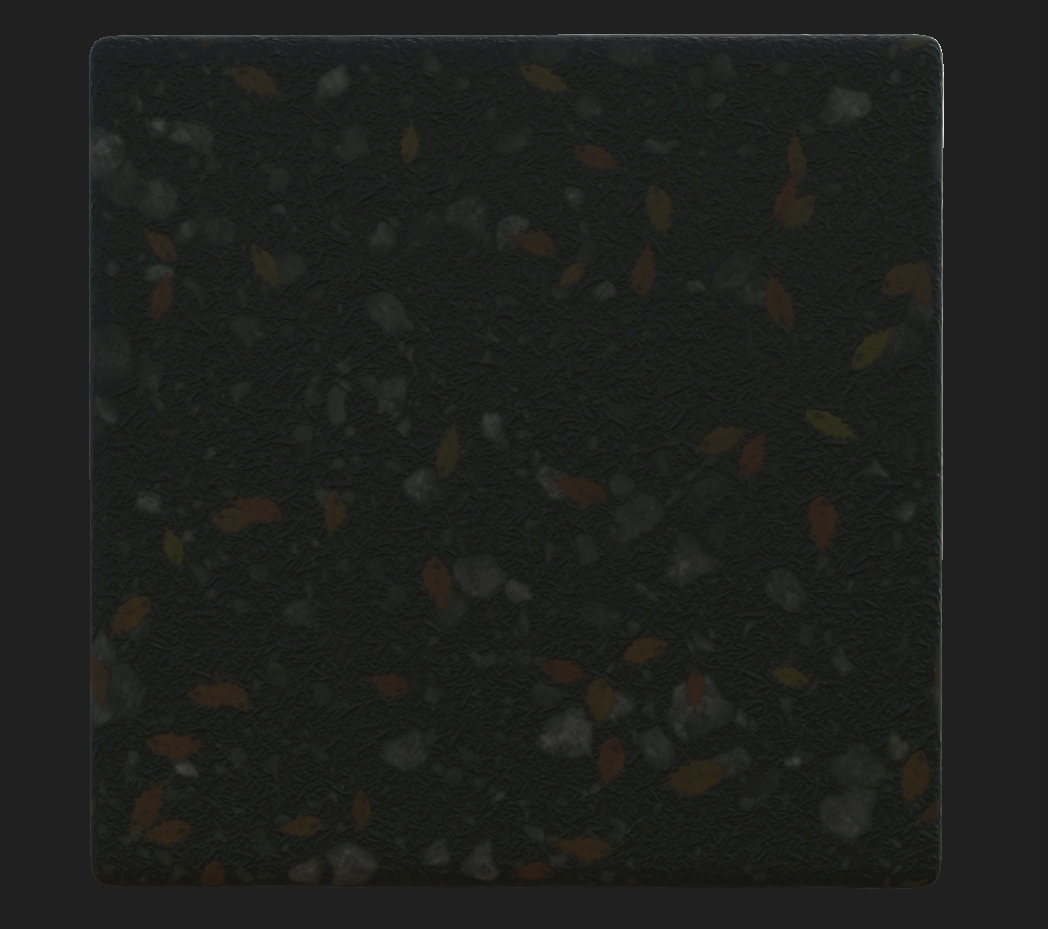
Texture 2 - Forest floor + (Leaves):
This texture was more a tricky piece, something that I've done before but not to this level. You should be able to see my different variations from my year 2 project, this one was a whole other world of tricky. This being said it was needed precisely this because of the fact that it can be vertex painted in UE4 including the ease of removing the leaves because it is a separate graph shown below. The leaf was easy to create as it's very basic but the actual graph with the correct height maps and AO allowed me to add in the leaves as a 'drop' pattern creating a more realistic feel to the whole scene.
Forest Floor + Graph:
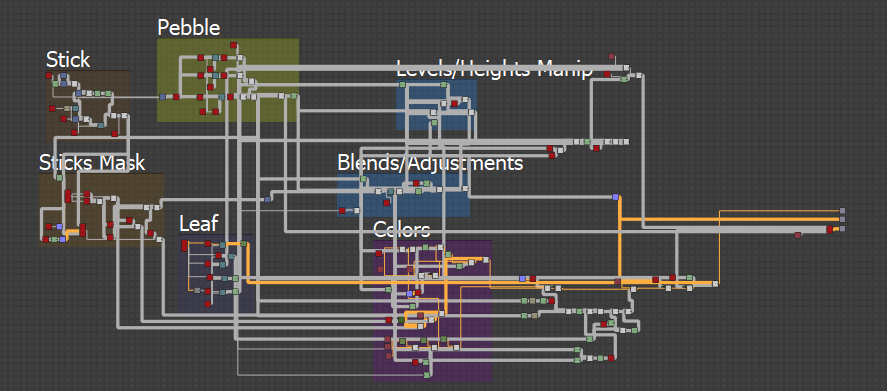
Leaf Texture + Graph:
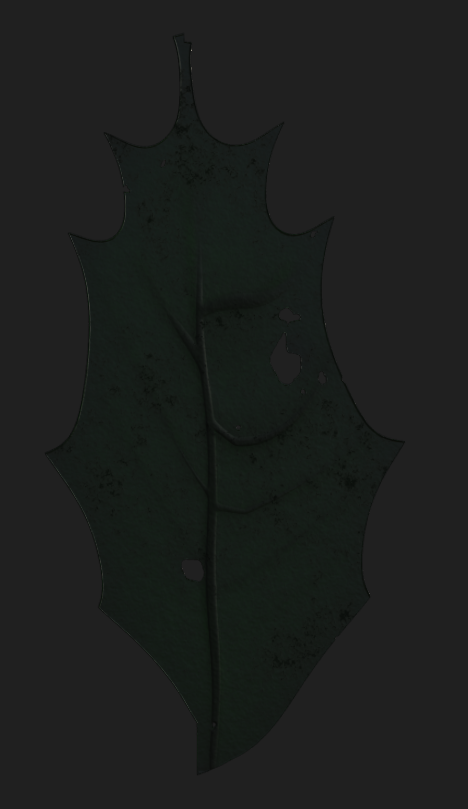

This took a while, but taking influence from my previous graphs as well as many others on Artstation and Substance Forums I was able to create exactly what I wanted. Surprisingly it was very easy to seek help with this sort of thing as many people have done it before and most of the time people would recommend different ways of doing things and creating these graphs. The person I have to thank for this magnificent piece is Joshua Lynch, most people have already heard the name but his blog (https://environmentart.wordpress.com/page/1/) is every texturers dream explaining how things are done, how he goes about using and manipulating shapes all the way to putting them in game and making them realistic helped me with this piece especially. Luckily I found out about him over summer and read it previous so going back to his blog for the second time reading about his texturing adventures and how he manipulates the textures helped me create the floor and leaf with no issue (Including the colors in his environment post Texturing Values For Environments: Part 1). Also asking people who haven't seen it before for their opinion and how I should change/shape it was great, many people said more pebbles as previous I only had larger pebbles.
Edit:
I found making the wall in Z Brush was too long of a time scale so I decided to make a basic version in Maya and use the texture with tessellation to create this method (referenced from Call Of Duty Black Ops 4) shown in a later post.
No comments:
Post a Comment