I tend to start like most artists by finding a reference point. Lets take the top half of this image as a open reference, open being that we wont make it exactly the same but will try to get the basic shape and colors (Every artist puts their own spin on things).

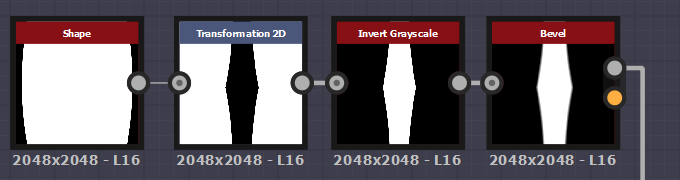
Lets get started, I firstly would take a normal shape (Disc) and immediately manipulate it to have a tight edge so that way I can then transform 2D it with the tiling left on so it will create a almost stretched diamond effect. If you notice the basic shape of Bark is just a stretched diamond warped a hell of a bunch. I would then invert so that way we can work with the inner shape, adding a bevel so it will give off a blurred effect around the edges allowing for height to be created. Slowly this allows me to build up a height map as you will see later down the line.
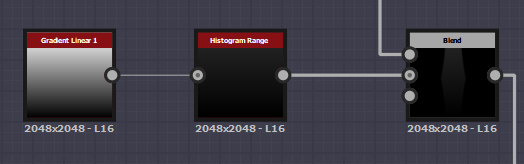
I would then add that bevel to a blend in the foreground. Again I added in some level of height to this by using a gradient linear 1 into a histogram range to not have the height be too harsh just like in the reference image it only slightly comes either in or out of the tree itself. I then add this to the blend with a Multiply blending mode.
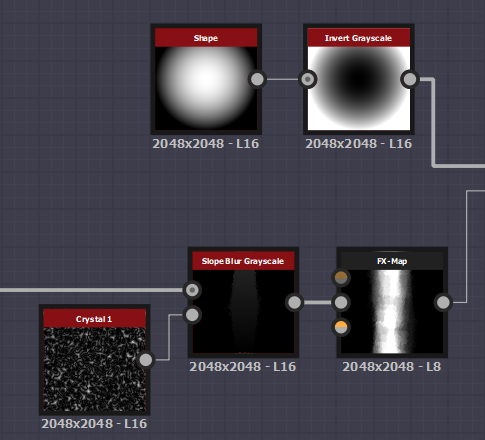
After blending I want to add that jagged edge into the wood, so what I used was a slope blur gray scale and attached the initial shape into the foreground and a Crystal 1 noise to the background. The reason I chose Crystal 1 is because it is very jagged and all over the place as well as being randomized. Now it gets tricky, we've made the shape but this is a sneak way I learnt to create a height map whilst keeping the whole shape in tact. I created a FX-Map so I would get a more random and heightened shape then grab a paraboloid shape, invert it and add it into a blend with the FX-Map with a subtract so it would be white in the center circle and fade out towards the edges adding more height to the middle of the bark.
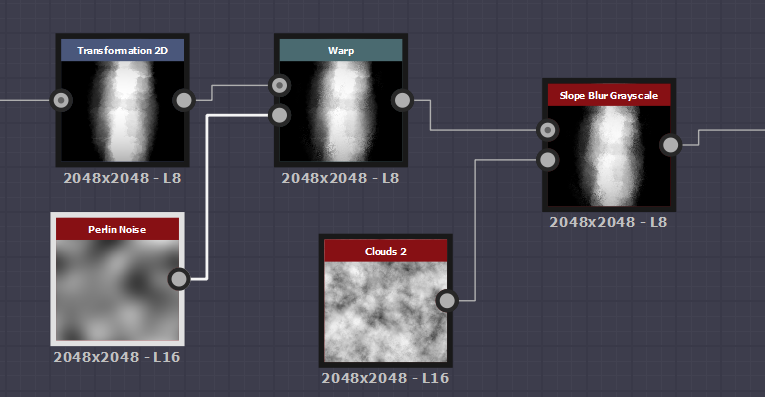
This is just a small amount of warping and blending with certain noises to get the initial shape that I want along with the height mapping. You may notice I stretched and squashed the blended shape to make it thicker and fatter and that is because I want to create a thicker version of the bark for my tree, if you want to keep it thin just stretch it upwards and not side wards.
FX maps are something that I learned during the process of making this as it was suggested to me so that I can get a easy height map result using basic shapes. The tutorial I used in this case (https://support.allegorithmic.com/documentation/sddoc/fx-map-node-129368197.html) was allegorithimics own tutorial.
FX maps are something that I learned during the process of making this as it was suggested to me so that I can get a easy height map result using basic shapes. The tutorial I used in this case (https://support.allegorithmic.com/documentation/sddoc/fx-map-node-129368197.html) was allegorithimics own tutorial.
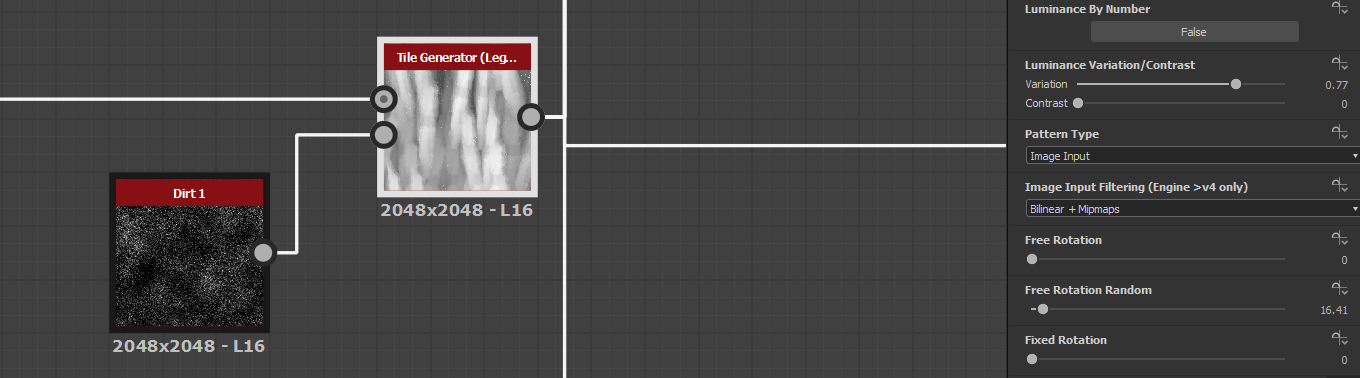
For this next part you have to follow these exact steps. You may notice my Tile Generator has (Legacy) next to it, this is because I had to use a older version of the TG to get a certain setting. If you want to get this older version you need to go into your library and find the tile generator, right click it and then click the link to open the file path. From there you will need to find the older Tile Generator and open it, then from there you can drag and drop it into your graph. This works with any older nodes but be warned sometimes they come up as 'ghost nodes' or are unidentifiable. Now that we have this done, the Luminance variation/Contrast is the setting needed from the older tile generators that can't be manipulated in the newer tile gen (if it can be then I don't know how). This allows for proper height mapping, the reason for dirt 1 is because it's simple and has small amounts of dirt that when put into the height map aren't noticed because they're mostly white/gray. This means it will add little detail here or there but nothing massive (helps create a dirty moss/wood).
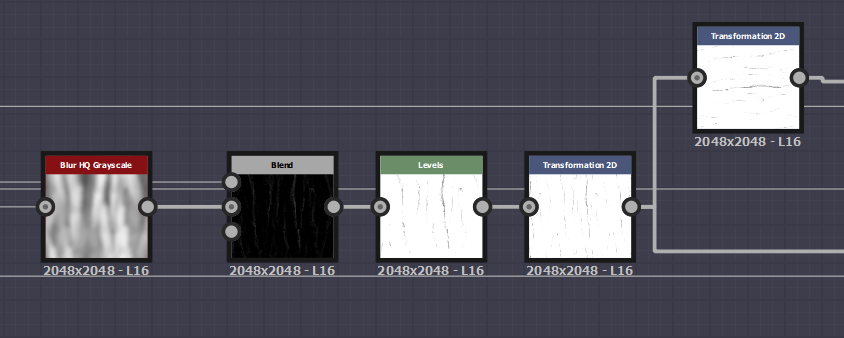
After going through the tile generator I wanted to add in a small curvature to the edges of the wood bark. Doing this the blend fits both into the blur HQ gray scale and the tile generator with subtract so that it allows for the curves to come through. Then adding this to a levels to give more height information as well as minor details with the smaller dirt 1 node seeping through the cracks. This allowed for the curved edges.

Now for the cracks. Again doing the same process as before, blur HQ grayscale and blending the blend with a subtract adding it to a levels but instead having the white come through creating a AO map as well as another form of height map or at least the start of a AO. The 2D transform is to increase the size of the whole texture, allowing for more detail in the bark as well as more bark 'strips' to be put into the overall texture.
I then transformed the 2D transform into 2 directional warps with more 2D transforms rotating them 90 degrees and blended them into a multiplier blend node. The reason for this is to add in the slight detail of marked wood. Small details are what make this texture and if this isn't added the texture loses a whole amount of information. I then blended it with the initial first blend again in a multiply so the detail can remain on top of the original blend.
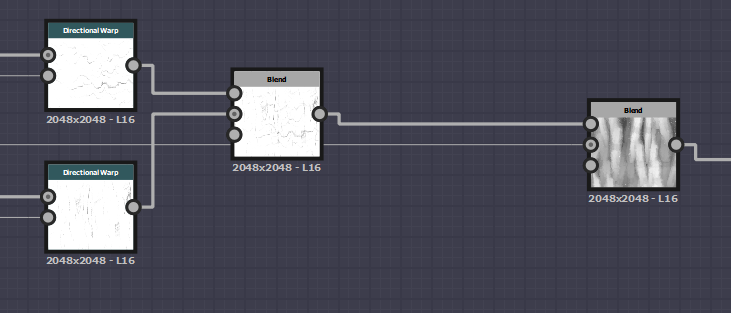
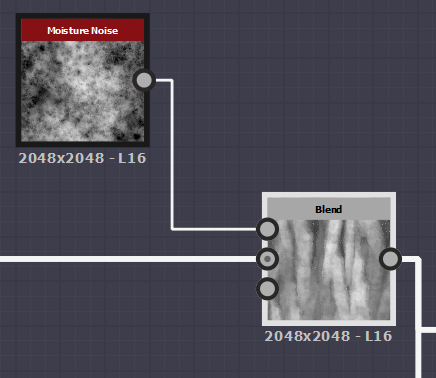
Using the blend just made I then added a moisture noise with another blend to create some amount of information on top which allowed for me to change the color and add in a lighter version of the bark. Again the blend is another multiply so the smaller information is added and not the mass amount giving small yet helpful information to the texture.
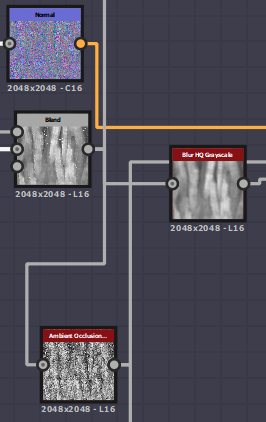
After doing this the texture is almost ready. We just need to create the Normal map, Height, AO, Roughness and then color it. To start this I created a normal node and plugged it in from the blend. Now for the next part the detail, I added the blend and the Curled edges into another blend with a Add (Linear Dodge) and on this occasion because it was too sharp I brought down the opacity. Off of this blend I created a Blur HQ gray scale for the height, plugged it into the AO node for the AO and finally inverted the gray scale for the roughness and plugged that into a histogram range. The blend previously created plugged into a gradient map and using the 'pick gradient' I drew over our reference image and used the colors from that to create a base color. If you have another texture be sure to plug these into a base material node so that you can create a mask and add in your other texture that you've previously created (mine being moss).
Now comes the part where you need another texture, what we're doing here is masking out areas on the overall texture to add in the moss created on my other texture. I started by grabbing the tile generated piece and adding that into a invert gray scale. Creating a height blend off that using a Grunge 13 map (older version is much better believe me) and adding that to the height blend, then into a blur HQ gray scale which is our first mask. Then our second mask is using the same grunge 13 applying that into the background of a blend node and adding the grunge 4 map (legacy again older is better) and multiplying the two together and adding them into a height blend. Using the inverted gray scale adding that to the background of the blend to create our second mask.
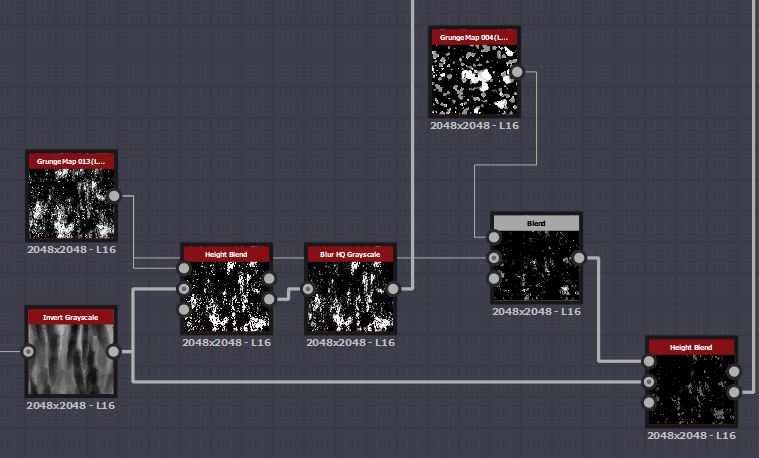
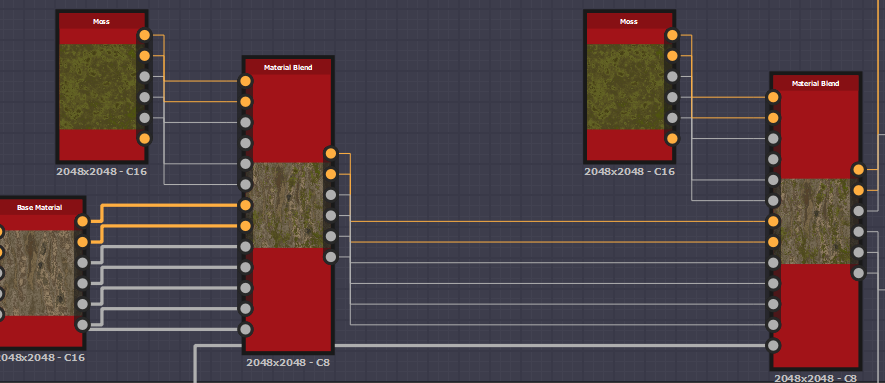
Just for quick clarification the 'moss' node is my other material before you all look confused at it. Also don't forget to setup the material nodes with your correct channels (Base color, Normal, Roughness, Metallic, AO & Height). The initial base color is plugged into the bottom part of the material blend, moss at the top and underneath all of that is our mask node. Plug the first mask into the first material blend then the second into the second. Once you've done this the masks should do all the work for you and you should get some sort of result when plugging them into your final nodes.
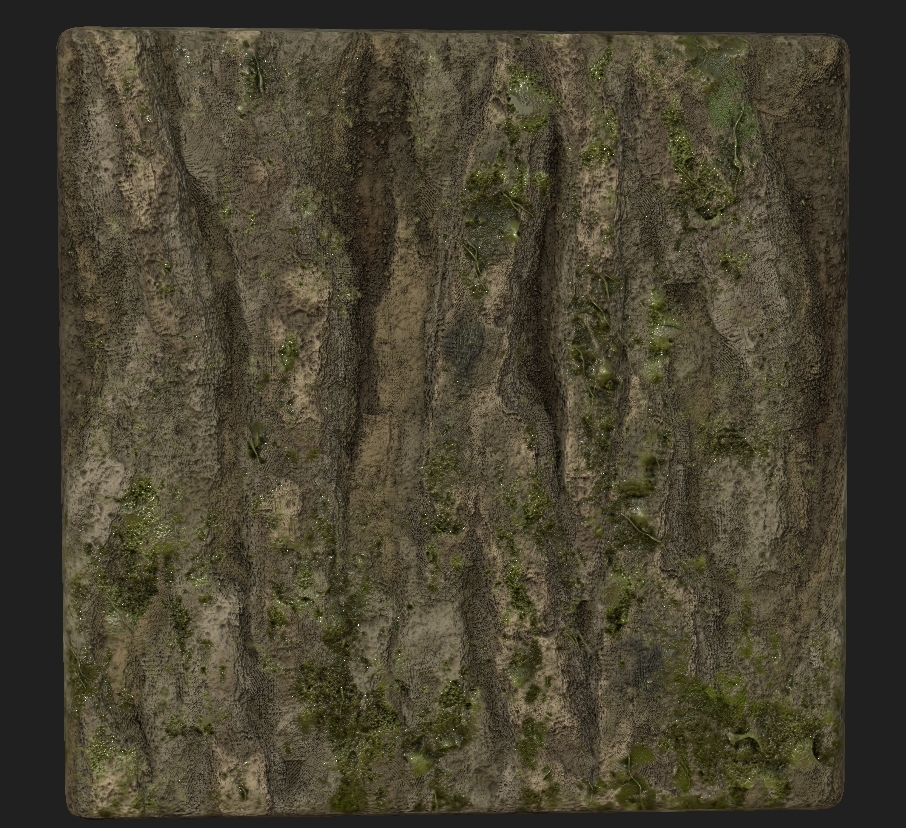
This is predominantly how I work and my workflow, the final result shown below is purely 2D with no tessellation. This is done for one of my projects in my third year and just a idea of the sorts of materials I'm able to create. Most of my workflow is created by looking at peoples graphs on things like Artstation and through their portfolios so many thanks to everyone who is willing to share their work and show you how it's done.
Now comes the part where you need another texture, what we're doing here is masking out areas on the overall texture to add in the moss created on my other texture. I started by grabbing the tile generated piece and adding that into a invert gray scale. Creating a height blend off that using a Grunge 13 map (older version is much better believe me) and adding that to the height blend, then into a blur HQ gray scale which is our first mask. Then our second mask is using the same grunge 13 applying that into the background of a blend node and adding the grunge 4 map (legacy again older is better) and multiplying the two together and adding them into a height blend. Using the inverted gray scale adding that to the background of the blend to create our second mask.
Just for quick clarification the 'moss' node is my other material before you all look confused at it. Also don't forget to setup the material nodes with your correct channels (Base color, Normal, Roughness, Metallic, AO & Height). The initial base color is plugged into the bottom part of the material blend, moss at the top and underneath all of that is our mask node. Plug the first mask into the first material blend then the second into the second. Once you've done this the masks should do all the work for you and you should get some sort of result when plugging them into your final nodes.
This is predominantly how I work and my workflow, the final result shown below is purely 2D with no tessellation. This is done for one of my projects in my third year and just a idea of the sorts of materials I'm able to create. Most of my workflow is created by looking at peoples graphs on things like Artstation and through their portfolios so many thanks to everyone who is willing to share their work and show you how it's done.
No comments:
Post a Comment