Monday, 20 November 2017

Week 4 - Substance Designer


Weekly upload 4 - Substance Designer (The test)

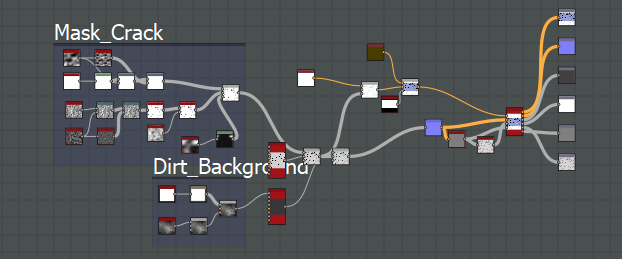
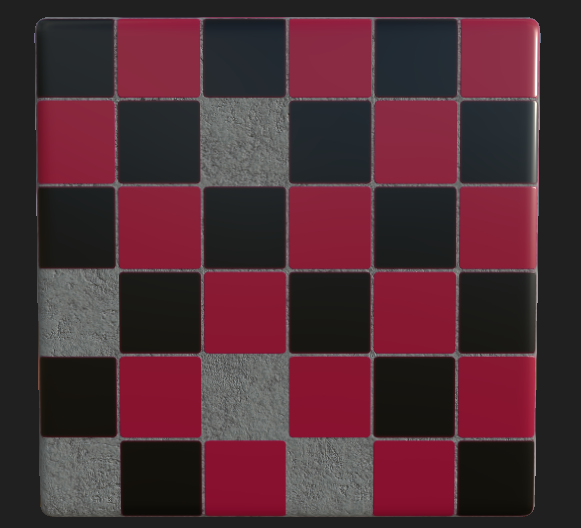
This blog entry will be based around the small test that we were set by our lecturer to see if we have a basic understand of how the program works and how to construct a simple material. This concept was brought up from the previous weeks which was to make a tiled pattern with a feel to it (emotion and construction). I went along the lines of old war-time tiles in a subway. Something that was allowed to be torn apart and also be well put together. The image below shows the end product of what I was looking to achieve, a simple tile pattern mixed with beat up tiles and some even chipped or blown off. At this range you can't quiet see the damage effects of the cracks etc. Shown below this image is a close up of this creation.

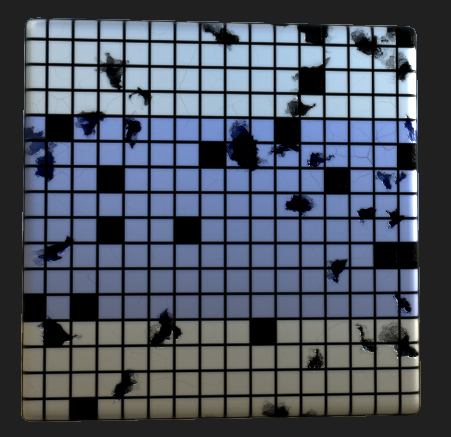
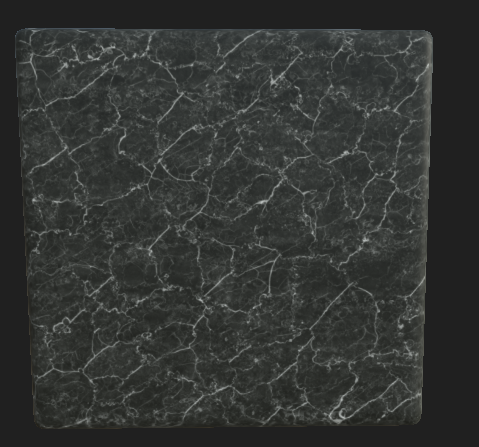
Full Finished project
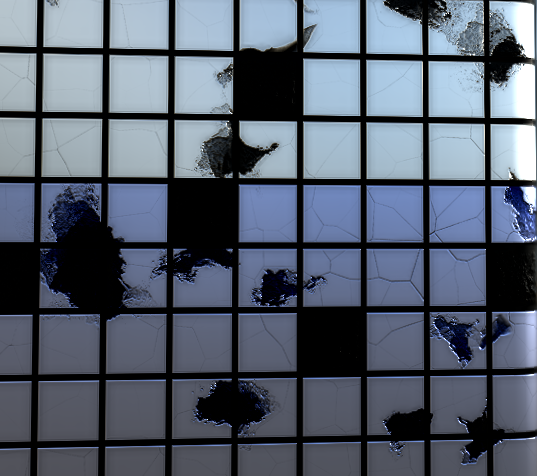
Close up of cracks

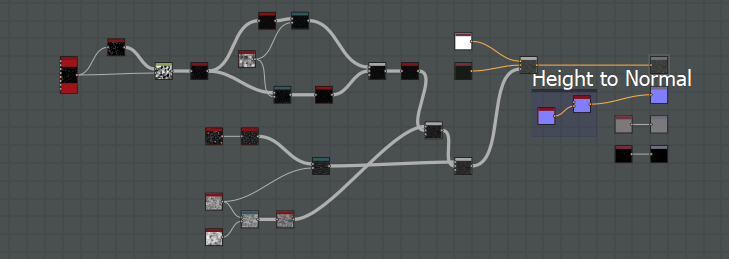
The reason I chose to go for this sort of layout is because of the simplicity of it as well as the simplicity of the graph as well. The reason I liked the marble design so much was the realism of it alongside the honest simplicity of it. This is why I chose to do this tile pattern this way as well as the overall design plan. 


Week 3 - Substance Designer


Weekly upload 3 - Substance Designer

The third week of my blog is going to be covering smaller projects that were thrown together to teach us the important parts of the program. Again we were shown basic tiling shown below with the marble flooring and how to repeated the pattern with randomness adding in to make it look a lot less linear. A very basic pattern but something that is almost a necessity in any game with buildings. The simplicity of it was something that I learnt from this experience though, it has such a simple graph and pattern layout that when creating it we used minimal tools needed. Shown in both the image and graph below. 


The graph below showcases the simplicity of the actual making of it all as well as the amount of work needed for such a realistic material. 


After creating this marble material we then were able to ask what sort of materials/ideas we had and the lecturer would then show us how it was done. In this case we happened to stumble onto something relating for our first year which was bullet holes/damage. The issue I had when creating this was in the university is out dated versions whereas mine is the most up to date, creating issues with the actual material. The image shown is what I have manage to import over but shamefully due to the file being corrupted in the transaction a lot of the material didn't stay. 


As you can see from the graph below, the height map and more was used but when converting it all over it shamefully didn't bring that information. You can see the concept of what it is meant to look like by the image shown above but not the entire finished project. I retried opening it in the university but no luck was given and the file was forever lost. Either way the template is there if I ever needed to recreate this concept. These two separate sessions were very educational and helped me with the next project.


Week 2 - Substance Designer


Weekly upload 2 - Substance Designer

Second week going into Substance Designer we were shown how to adapt and create more in-depth detail into our tiles. This was something that was fun but un-necessary to showcase in this weeks blog. I'll skip this week and move onto bigger and better weeks whereby I have more to show and better understandings. In the weeks passed the tile generation piece, we were shown how to create a diamond floor piece. Something more along the lines of worker grilled diamond plated flooring, another floor substance but another challenge none the less. Creating this was simple as we had help quiet a good amount from the lecturer and having a common understanding of how the program worked from the previous weeks. The image shown below is the diamond plated surface we created. As you can see it has a 2D image masked over the top of the tiles, this was something I personally wanted to learn for a personal project so I'm glad we covered this in the session.


The graph shown below is a lot more complex than the simple tile generation that we previously had.
This is due to two things, one being that it's not cleaned up and very messy to read. Two being that the diamond plates needed to be on top of everything, including the original 2D image that's put on top of the background. Not only that, I wanted to completely put a sense of realism on the object by adding in scratches, torn paint and even stripped paint/chips. Accomplishing this was something we were shown but something I wanted to learn. This session was probably better than the previous 3 as it threw me right into the program rather than holding back.


Week 1 - Substance Designer

Weekly upload 1 - Substance Designer

The first week of Substance Designer was something I was looking forward to as I chose it for my specialty and it lived up to its expectation. The reason I chose this was primarily to go into level design as well as material substances which is something I've enjoyed in games more than the actual game play itself at times. Our lecturer introduced us to the basics of substance and showcased some work that can be accomplished. This slow introduction as well as showing us the basics allowed for me to get a full understanding of the sort of results we should be expecting.


This first image showcases what we learnt within the first session, a basic tile generation with some missing tiles and also a graveled background. 


Using tile generators we was able to finish off the creation of the end product. This was a brilliant and very easy to understand introduction with us getting used to the program.