
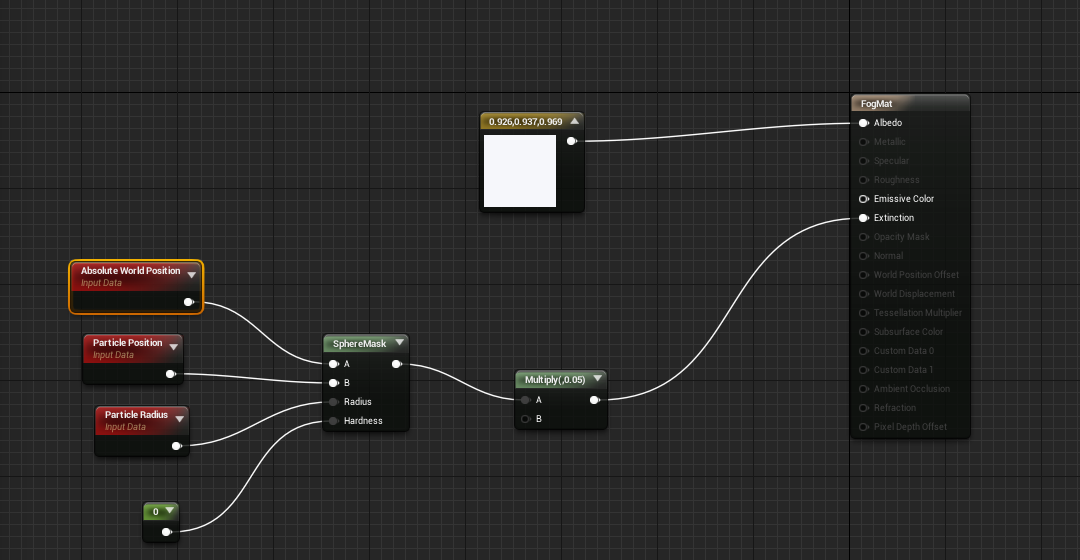
I started off by making a material as most do before creating a particle effect. I started by changing the overall material from surface to volume because it's a volumetric mesh & the blend mode to additive so that it can determine how the color is blended with the background colors allowing color to flow through the fog although I will be setting a overall color. I then added in a albedo of just a basic white color, absolute world position so it can be moved though it's going to be a low-level fog. Particle position so it follows a path and the a particle radius so it has boundaries. I added that into a sphere mask so that I can merge it all into one mask and then subdivide it by a certain amount to make it fit the scene. I then plugged it into the extinction so I can control the translucency of the overall material. The image shown below is how I had it laid out.
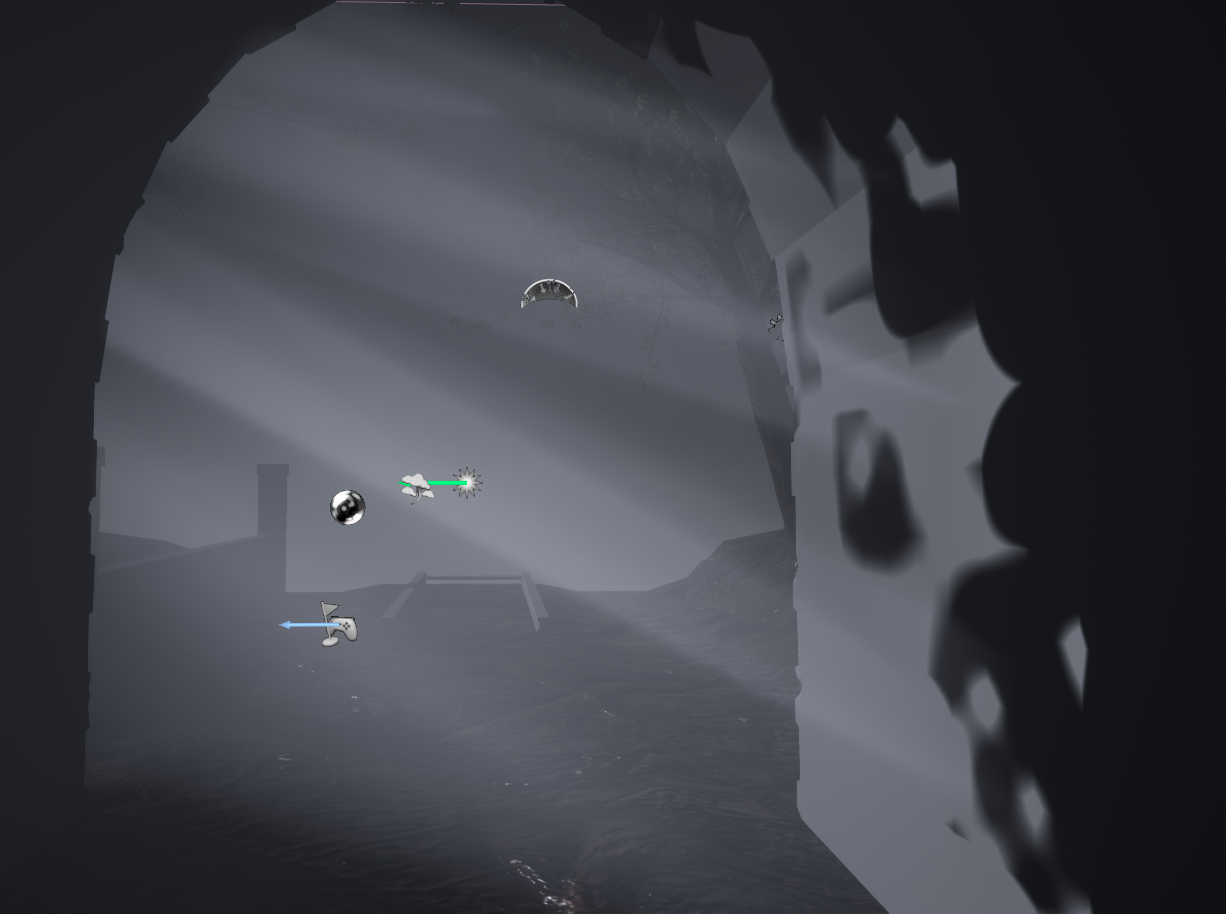
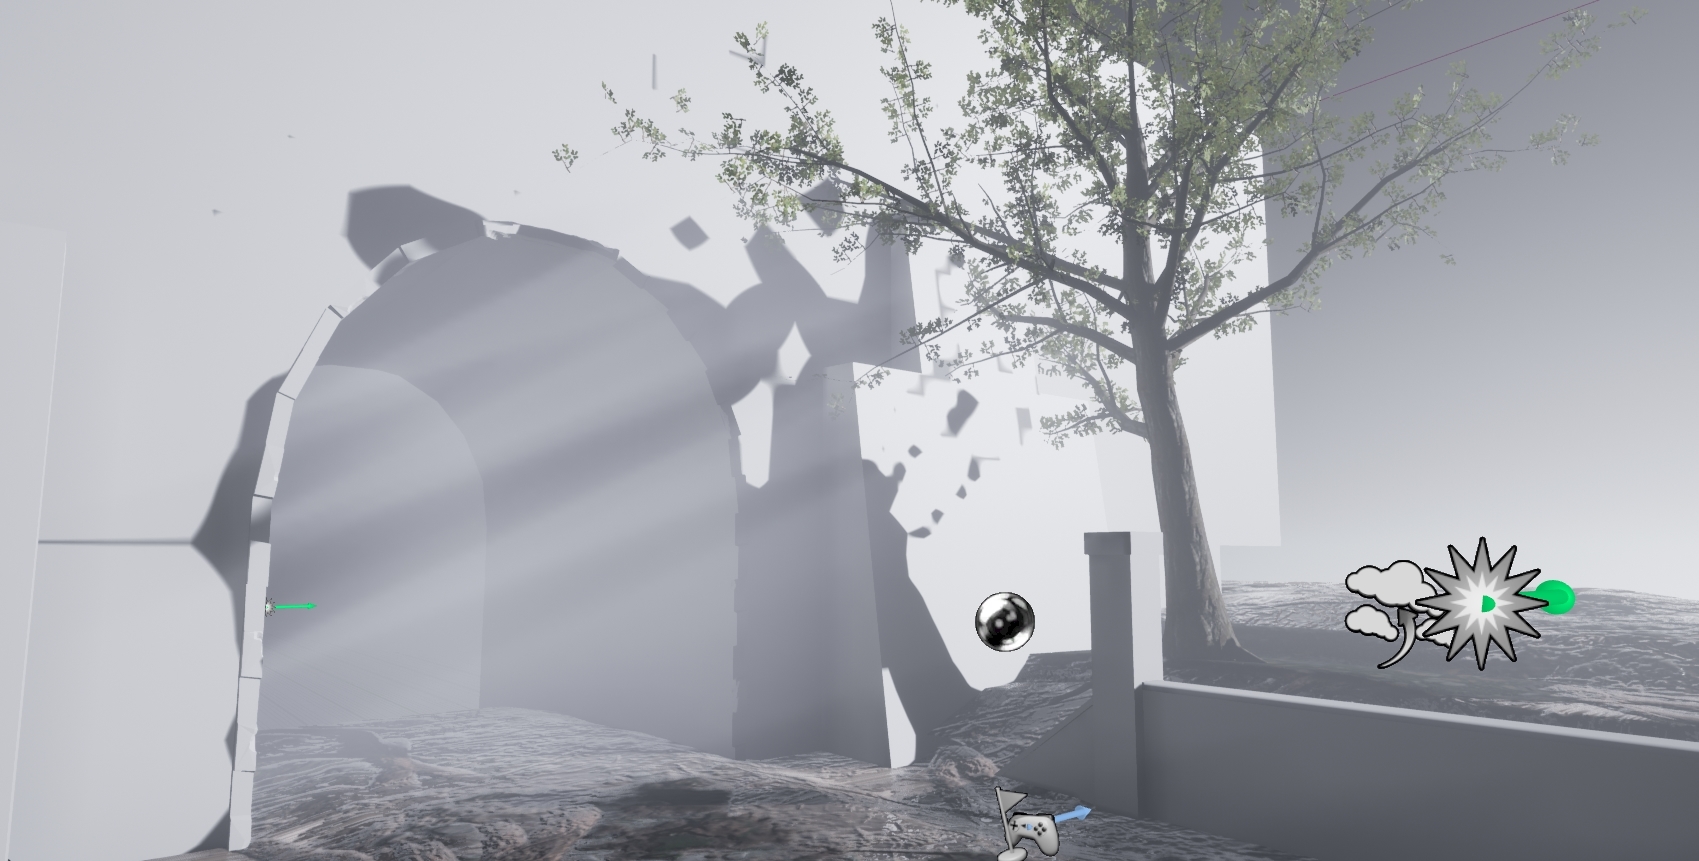
I then went and make a particle effect which if used correctly will emit smoke at a slow pace making it look realistic and thick. To do this I had to add in a cylinder in the locations to make it have a bounding box that would fit the particle effect not just the material, other than that I don't need to add anything else. I changed the spawn time constant from 1 to 40 to slow it down and allow for motion, the lifetime min and max were set to 5 and lastly the initial size was set on the X axis to 1500. The idea behind this was to make it all look realistic with smooth elements but something didn't quite look right. I had to go back onto my previous project to see where I went wrong because the displacement and the overall feel of the fog wasn't quiet there. I then realized that my 'Distribution Float Constant' wasn't set to Uniform, because of this minor thing it made it look unrealistic. Changing this over gave it more of a motion and feel. I only changed this for the Lifetime and Initial size, not for spawn as it wouldn't make much sense to make a spawn rate uniform (Randomness is the key). That is all for the fog, now for the lighting.
The lighting was simpler to understand but only because I've touched ever so slightly on it during the previous project. The idea was to delete the sky sphere, use directional lighting and a skylight mixed with a post process volume to create exactly what I'm after, a mid-day gloomy grey sky. Using these elements I changed around the light settings on the directional light allowing for shadows to be cast as well as having a effect on the fog itself (previously setup in the material for the fog). Starting off I change the transformation so that it would shine in at a angle good enough for shadow casting but also so that peoples attention is dragged either into or away from the tunnel due to the thick fog hiding what's behind it. This means the lighting intensity must be high on the directional light but weak on the skylight so I set the intensity of the directional light to 1000 and then the overall cubemap resolution on the skylight to 256 with a sky distance threshold of 20k and a intensity of 1. I then added in a PostProcessVolume with a exposure rate of minimum 1 to a maximum of 2, the reason for this is so that it gives off a exposed look and allows the whites in the fog/lighting to be more sharp. Other than this I added in a SphereReflectionCapture to ensure everything is captured within that sphere and not using too much information outside of it allowing for better performance. The images below show off some of these effects.
Links to all forums/tutorials that helped me:
https://docs.unrealengine.com/en-us/Engine/Rendering/LightingAndShadows/VolumetricFog
https://shaderbits.com/blog/ue4-volumetric-fog-techniques
No comments:
Post a Comment