Wednesday, 21 March 2018

BA2B - Prop Creation - Week 3

So after finishing up with the particle systems and my research I then put it all aside and started the prop creation. A list was already set out for this as we're going to try and get exactly the right amount of basic props in before we start adding additional non-necessary items. This means adding in the basics such as Cups, Candles etc. Anything you'd find in a cathedral basically that is a minimal prop. The primary research helped me to understand the sorts of items kept around a cathedral including the treasury items such as the chalices and plating. This overall gave me a idea of having every single small level prop that was metallic to have the same UV spacing on one sheet so that way if I want to put a 2048x2048 texture on all these models I wouldn't be wasting memory instead I'll save memory by allocating the same texture space across all the models, shown below is a example of this.


With this methodology in hand, I will be able to lay a non-repeatable texture across all the objects whilst having them share the same amount of information on each UV. This will not only speed up texturing but also save on memory and usage in the actual engine. Obviously it wont just be the main texture over these, every item will have a little bit extra texturing which will be down to the object itself such as the cup having minor fingerprints etc. This will be my main goal for this week to see off the week, finishing this object list and having them all share the same UV space as each other. If possible and if I fill out this UV layout then I will move onto texturing immediately to ensure time and management of time. Perhaps even getting ahead of myself, not that I am not right now but more towards getting everyone ahead of themselves.

Objective with these assets:

Metallic Pack

Asset List:

Various Mugs & Goblets
Medieval Pots
Jugs
Bowls/Cuttlery

This Pack contains objects which are "metallic in nature. x3 Texture sets are necessary for these objects. "Clean", "Rusty", and "Dirty", with x2 different metal compounds for each set.

Steel/Iron - Clean, Rusty, Dirty
Alluminium/Copper - Clean, Rusty, Dirty

All objects are to be created in the same, single scene.

All objects must be in combined in to be in the "same mesh" and UVmapped, ensuring all objects share the same 2048 x 2048 UV space.

Tuesday, 20 March 2018

BA2B - Particle Effect - Week 3


Alongside the many other things I've had to do this week, particle effects was one of the tougher challenges due to having small amounts of experience with it. The only things I knew was how to create a simple effect let alone what the team wanted. They wanted something along the lines of a healing circle, instead promoting heaven and hell. I first started off this process of taking ideas from games like Diablo 3 and Baulders gate dark alliance, two games which I know relate around the idea of magic and heaven and hell. Showcased below are two examples of the sorts of particle effects I wanted.

Image result for baldur's gate dark alliance magicImage result for baldur's gate dark alliance magic

These images helped me to get a understanding of the sorts of basic concepts I want for the game, nothing too major in the forms of graphics memory or computer processing memory but enough to be able to give off the illusion of someone going to heaven or someone going to hell. I then looked into Diablo 3 and how they generated their effects and found the exact thing I wanted.

Image result for diablo 3 magic circle

This image is exactly what I wanted. Something that lies in the Z co-ordinate, that is flat but also has a effect of light going upwards or downwards dependent on heaven or hell. The idea behind this was to create a basic PNG in photoshop something with enough detail in it to represent the idea of a healing circle. Creating something this level is easy as it's just basic shapes. The image below is the image I chose to use, I had to make it black and white for when you put it into UE4 particle system the black deletes itself and you can change the color of the white.


After creating the PNG I then made a material putting both the image and a particle color then multiplying them together with the emmisive and opacity channels. Then changing the blend mode to translucent and the shading model to unlit to be able to see the material more clearly and get rid of the black background. After this step it was very easy to create the emitter for the actual PNG image. The idea was to have it spinning the same as Baulder Gate Dark Alliance along with some bubbles coming out of it to make it look like they're floating up to heaven. The bubbles were easy, just a gradient with the same process to create a ball looking material and having it with a high set spawn rate alongside other simplistic nodes allowing for me to understand it and learn from it. This allowed me to get more of a understanding of how these particle effects work by doing a simply formed effect. Shown on the left are the exact Emitters and nodes used to create the effects. 

I then done the same process for the hell version of the particle effect with a different PNG. This helped my knowledge of particle effects grow drastically but also having the information learned before helped me retain my sanity and not confusing myself along the way. 

GIF Link: End product - https://gyazo.com/ce22618f96090ca40cf432d2c38d13b7

Monday, 19 March 2018

BA2B - Primary Research - Week 3

Seeing as I was to be the main texture artist within the project I decided to take a small amount of time to go and gather some primary texture research alongside some assets and particle effect shape pictures. The reason I chose to go and grab these textures was because I believe the best way of finding out exactly what you need is to go out and get it yourself, images online wont give you scale or depth. Seeing as we're doing a cathedral esk level I decided to go to the Norwich cathedral with two of my team to get exactly the scale and ideas we need to complete our project. I would attach all images taken for the research but there are too many to post so I'll only post two from each and explain the idea and concept behind them.

I'll start with the particle effects seeing as it will be the shortest to explain. The idea here is to create these sort of floor patterns to emulate the idea of heaven and hell. One being dark and pointed, the other being light and rounded. Using both color schemes and particles to create almost a imagery of what it would be like to kill someone and send them to heaven & hell. Both being floor patterns with a light source colored to showcase easily which is which. This being said the two designs below are almost what I'm looking for, I'll make some iterations of these patterns and see what happens.


Now I'll move onto to the assets, the small amount I need seeing as I'm only a prop artist was the simple environment fillers such as cups, knives, candles etc. All these assets were taken from around the time period we wished to aim for alongside the nice scratched and dissolved texture.


With these sorts of assets I tried to take less information about the actual detail of it but instead recreate these simplified objects in such a way that the detail can be added through painter and designer rather than having to put it into zbrush and retapologize it. I'm more concerned on time and this asset is no where near gonna be a hero asset, more of a filler. The same with the image shown of the cup. These sorts of basic props is what I'll be creating due to the time taken for textures and zbrushing some of the character with Maggie.


The last thing but most important for my role is the texture studies, for these pieces I decided to take more of a role of getting information and height rather than just the texture itself. I decided to use the light against the textures to see where the shadow sat so that way no information was missed, shown in both images. The reason I've chosen these different textures is because they're the two which show most information. Each texture I create I'm going to try and either have primary research ready so that I can use that as a reference and if that's not possible in any way then I'll use secondary such as images or videos to create whatever else needed.


Most of this primary research was done in one day, this being said it is basically everything I need as of now. If I need more then I will attempt to book another outing with the team or go by myself for future references. This has taught me that it takes seconds to find proper research rather than flying through Google to find the exact image you want. Allowing for better time consumption and also an idea of scale you want. 


Sunday, 18 March 2018

BA2B Week 2 - Team management


With week 1 being as successful as it was I tried to get the team to relax a bit and have some time to themselves, giving Sunday a break day. If they want to work on that day they're more than welcome but I wanted to assure them all to take it off. Once getting started on week 2 Tuesday what I wanted from the team was constant progression updates to make sure no one was lacking behind and I could get a hold of every ones work pace as well as my own. I managed this by asking Harry (Our blueprinter/Discord server host) to make channels for everyone to put their work in.


The reasoning for this was simple, upload either writing or screenshots of your work to show me you're keeping up with your own set time frames. Everyone managed to stay on top of this aside from Blueprints because of the way they work. I reminded them to update the channel as they could use it for their own hand ins but as it's blueprinting the process is very long and dreary so you can't expect much from main mechanics in the first two weeks. I left a update noting that they should update it eventually.


Although our aliases are hard to get, I will name them below.

Milk - Me
Dervy - Dervis
Fathenzi - Lewis
MaggieVolk - Maggie
Regles - Regan
Tengu - Harry

The reasoning behind this is because that's our preset discord names. This doesn't effect our workflow, it's more for everyone to understand who is who. As for this, I am doing this weekly check to make sure each page is updated at least once. Other than this I making sure everyone is using the Trello correctly and the way I like for information understandings to be simplified. This is done by using the correct labels and layout efficiency. Shown below is how the Trello looks as of week 2 (link to trello https://trello.com/b/b35BqicS/group-collab).


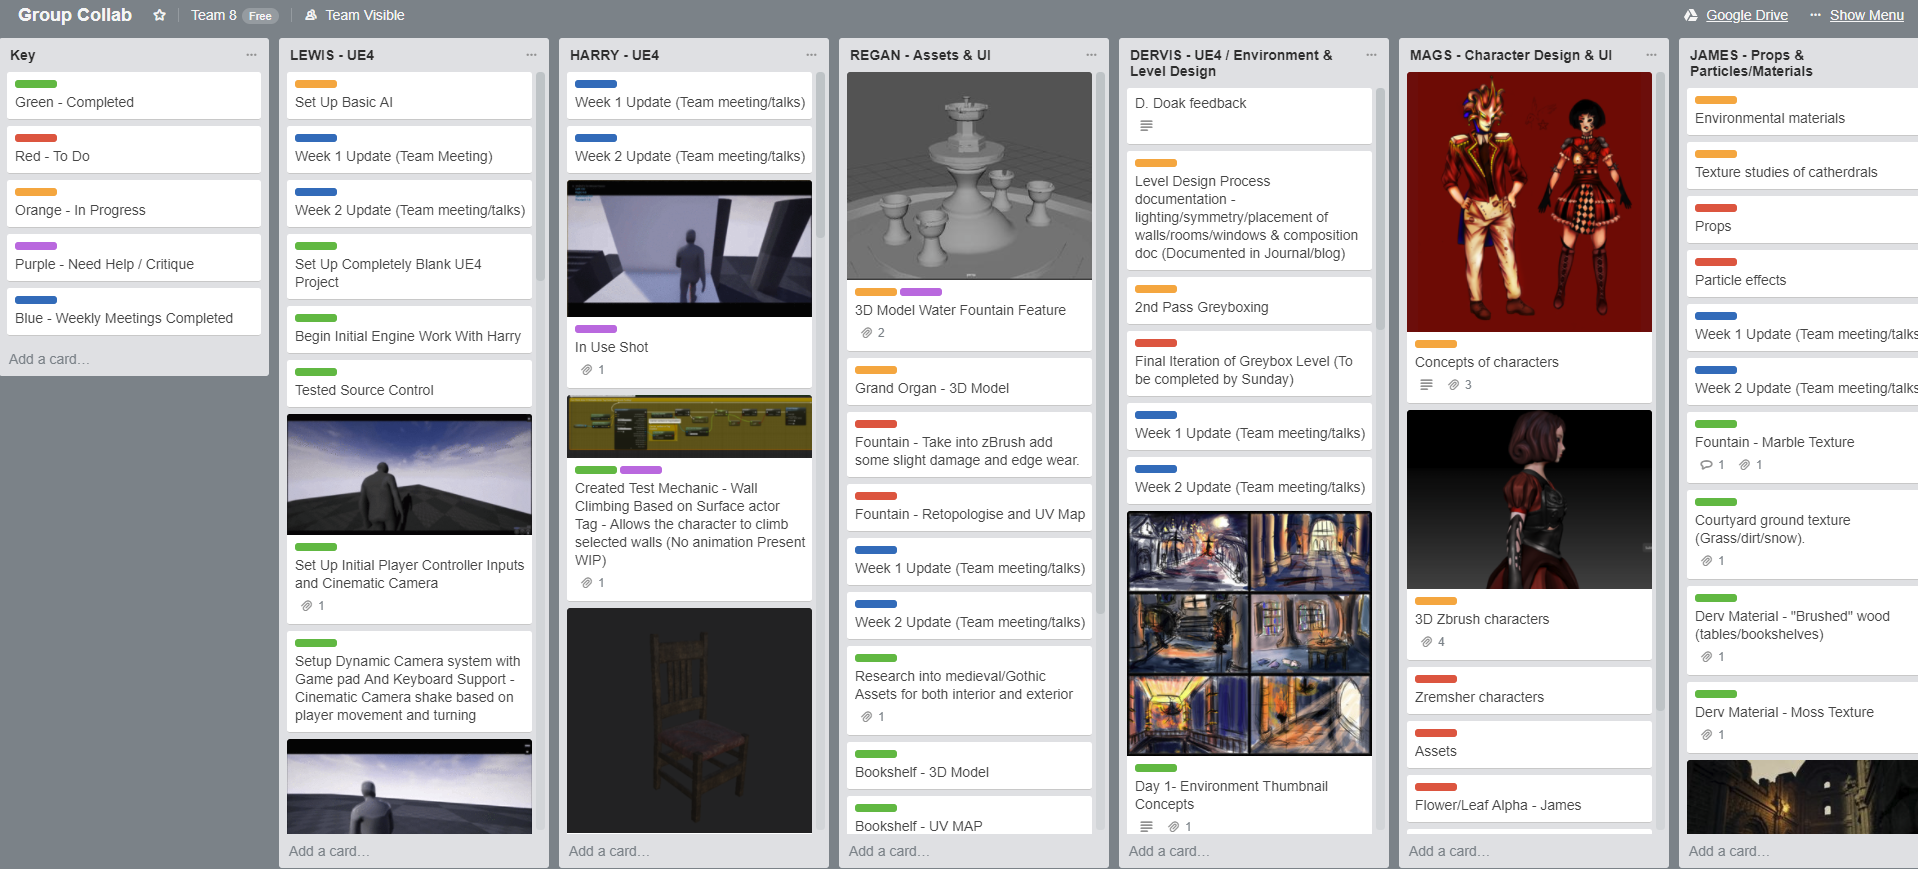
The keys are what we are primarily looking towards, keeping everything unfinished on top and everything completed can be moved down foe ease of access. The reason I've chosen to do a individual set of notes is because we're being marked individually thus the Trello being separate like this shows what people have done and what they're meant to have achieved. This alone will allow the markers to be able to look at the time management in the workflow of everyone. That's most of the team management done up until the weekly meeting. The meeting will consist of everyone maintaining the idea and concept we have in mind as well as any help needed in any respective subject can be assisted by whomever is good with that program.

My own work - Textures/Environmental pieces

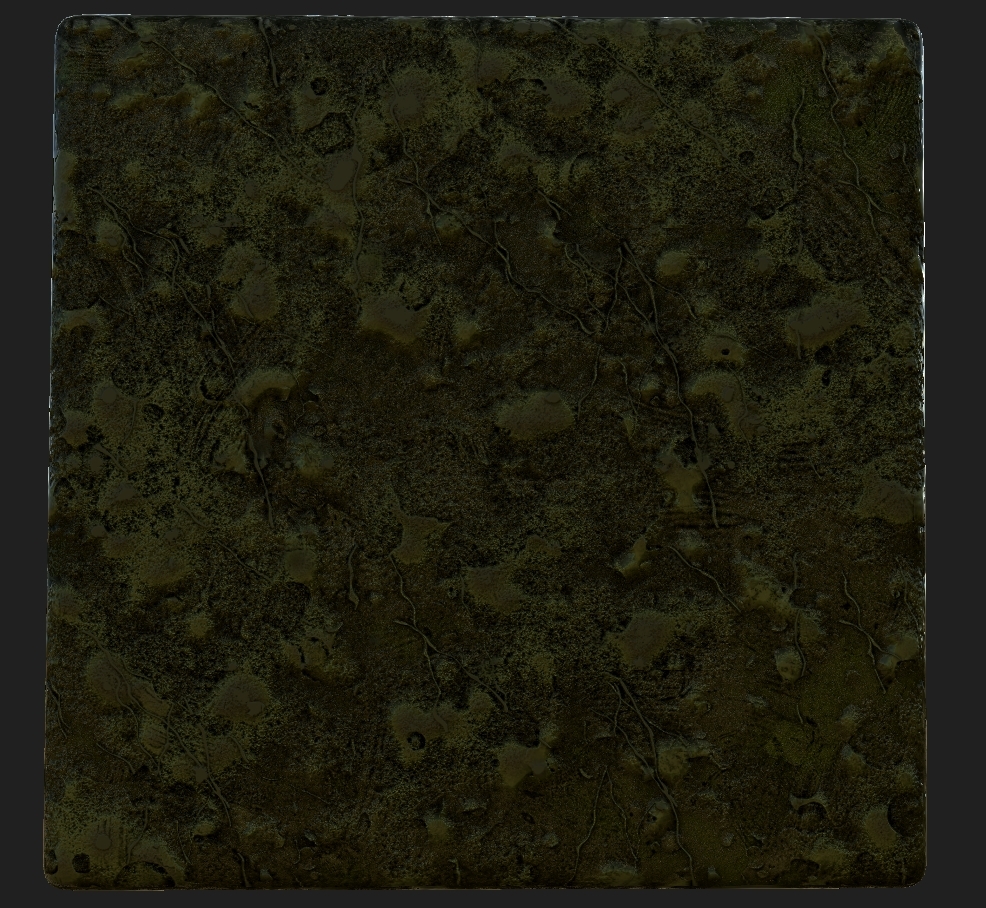
As for this weeks work of my own I've been asked to create sets of textures ready for assets and the main character. We will start with the asset textures first, I have been asked to make 1x Leather texture but 3 different color variations, 1x Wood texture that resembles dark wood and 1x snowy courtyard flooring. Show below is 1 variation of each that could/may not be added to the final product. I am still awaiting a response for most.


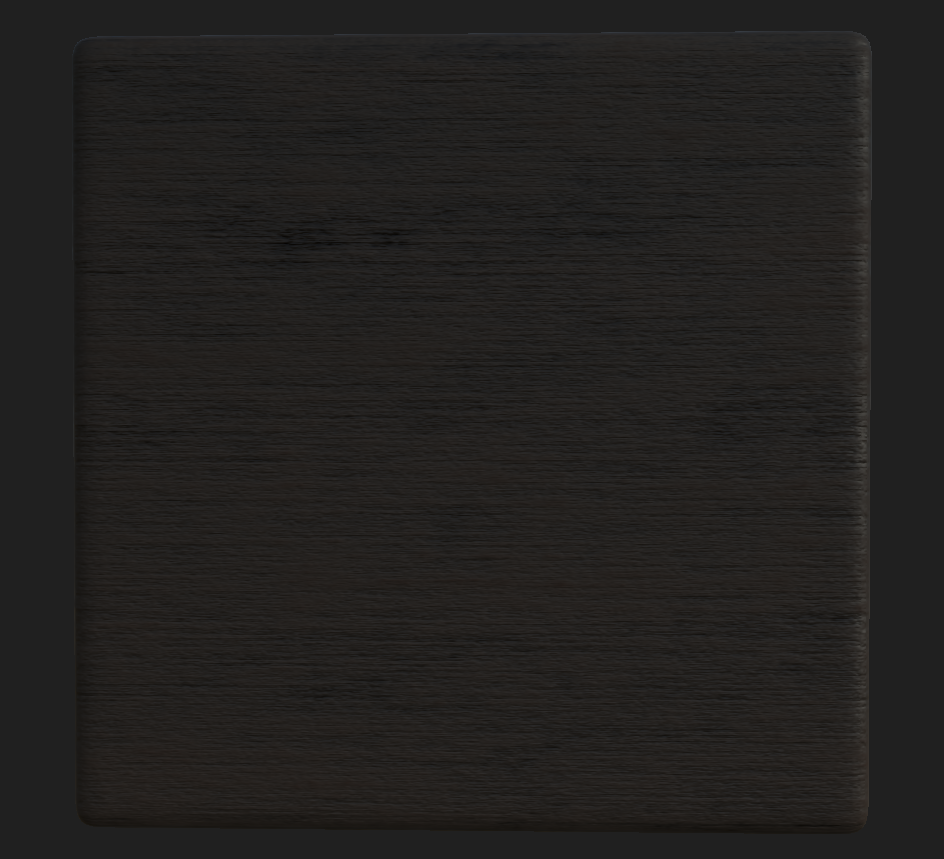
All these textures are 2048x2048 but for video memory sake it can be tuned either down resolution or up depending.


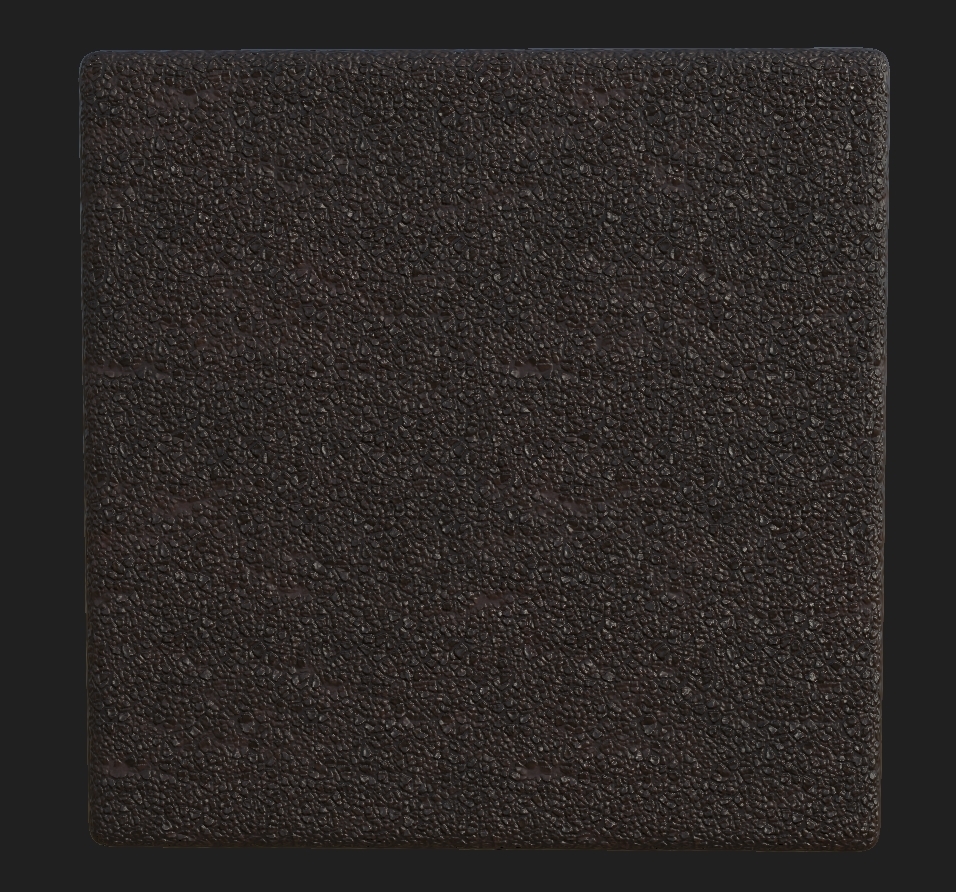
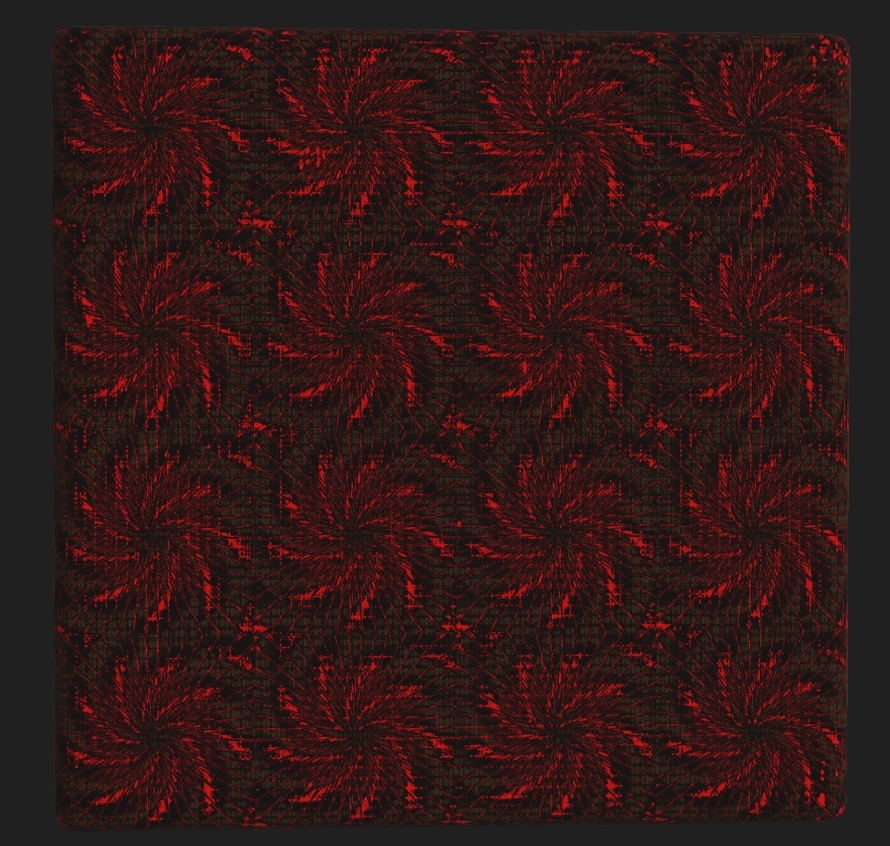
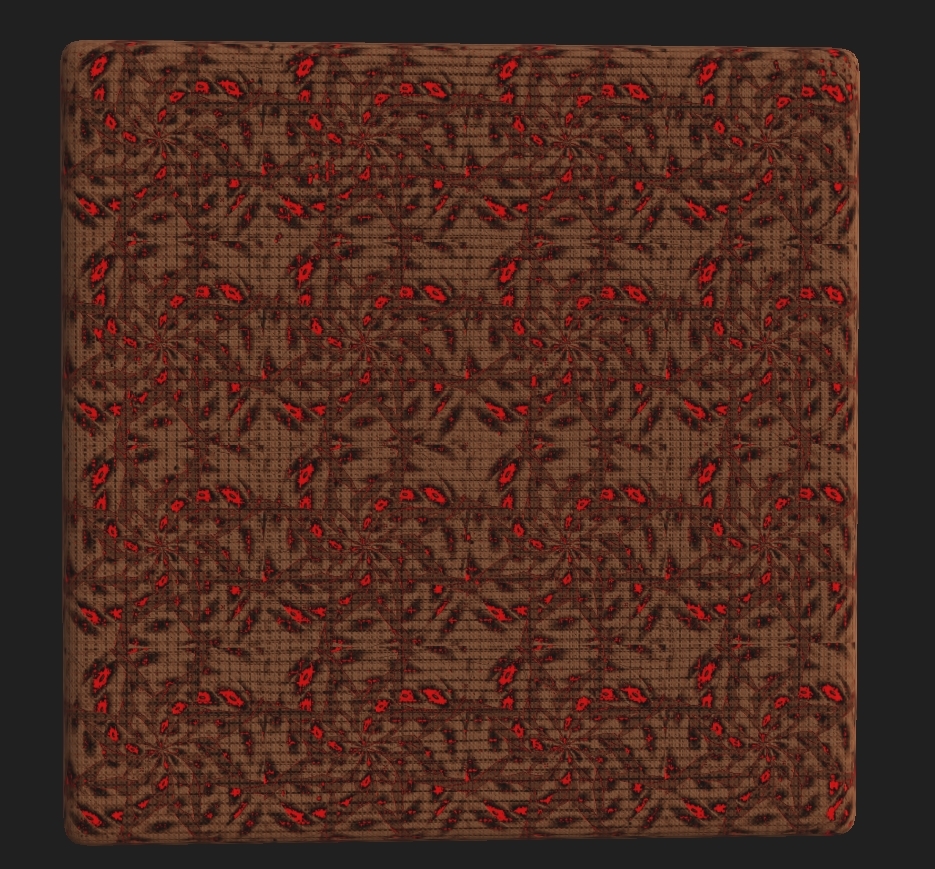
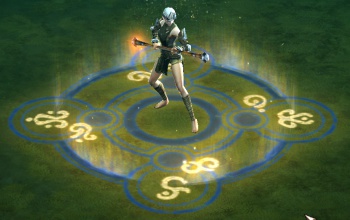
As for these textures I was then asked to create 2 different patterns for our main clothing on the character. One light and one dark, the concept behind this was to have the materials change adjusting to the light levels in the game, if you stand in the light for long enough the light material is there, if you stand in the dark the dark will appear using the opacity channels in UE4 to create this level of materials.

Dark texture                                                            Light texture


Completed this week from me:


  • Team leader role
  • Trello update
  • Presentation ready for week 2
  • Texture materials and reworked for exactly what they want
  • Concept materials
  • Google drive updated with correct folders for everyone
  • Team Trello updates
  • Team meeting 2
  • Prop creation underway (Regan checkup)
  • Main mechanic checkup (Lewis & Harry)
  • Meeting with Maggie about ZBrush help
  • Dervis checkup on environment greyboxing
  • Extra textures done in case needed (Extra time on hands and getting a better understanding of substance)
  • Discord updates
  • Attended weekly meetup with lecturer Stephen for feedback
  • Asked Kayleigh (Lecturer) for help with height maps
  • Emailed Chris about height maps in designer

BA2B - New Project - Week 1

The new course project came around, we have 8 weeks to develop a fully working game with a minimum of 1 working level, fully textured and at least 3 working main mechanics of the game. A team of 6 is required so specialisms can be adjusted for. This was great news to me as it can allow for me to be able to further my specialism in both 3D and high res texturing, the reason I say high resolution texturing is because it is something that I've wanted to do since using designer at the beginning of the year. This project required quite a lot of respective traits, one team leader, a Trello board (Of all progress) and to form a team. I chose to go less friendly on this project as previously on game-jams I maintained staying with friends. As for this project I wished to take it with a pinch of salt and grab the best designers/developers I knew from the course. Putting myself firmly as team leader I grabbed 1 concept artist/3D character artist, 2 UE4 developers, 1 3D asset creationist and then 1 overall artist for both level design and environment design (who has both a understanding of UE4 and 3D well). I then assigned myself to prop creation and texture artist for the prime amount of the project, this being said the roles aren't restricted and we flow well as a team to create what is needed with the help of each other (knowing this is how the team works through experience working with them previously).

Once we had the team assembled within seconds knowing we'd all like to work together we then started the concepts of what our games will be through team meetings (unrecorded first meeting but the rest are recorded). The first 3 days we set out just getting the ideas we wanted down and then from there collaborating and thinking of mechanics that will help our ideas. We noted all this down in our Google drive documents. As the team leader I setup exactly what was needed from everyone and gave them a expected date on which I wanted it all completed by. Using time management is something I need to work on so I thought this project will be exactly what I could do to correct this. The image shown below is most of our concepts from art styles to mechanics to the base story we generated. Once we had this understanding of what we needed to do we setup a Trello and got to work on everything basic that we know we was going to need. The speed this team works at is something that was new to me as everyone knew what to do and how to do it so we were ready to start development almost immediately. I'll let the game speak for itself rather than writing most of what we want here, the main mechanics is stealth based, the art style is part realism and the concept behind the game is someone sneaking around a cathedral avoiding people using light levels.


That is a basic understanding, now for the part I've been waiting for. Texture designing realism is something I've been wanting to do for a while. Keeping it efficient is something I'll have to learn for this project because of the resolutions of things being quiet costly in terms of video memory. Instead of using the texture height maps to create a level of detail we will be using geometry to keep the usage down. Saying this I will still create some textures with a height map in mind in case we can't figure out the geometry. I started immediately on certain textures knowing it was what we needed such as bricks, moss and more. Shown below are some examples.


The team leader role has come into play already, setting up team meetings, Trello, presentations and making sure everyone is on track.

Completed this week from me:


  • Team leader role
  • Trello update
  • Presentation ready for weekly update
  • Discord setup
  • Basic textures made
  • Concepts and ideas put down
  • Team concepts in google drive
  • Documented art styles
  • Team reassurance (Making sure everyone was happy)
  • Team trello updates
  • Team presentation updates
  • Team meeting 1
  • Readying everyone for week 2


BA2B - Week 1 - Collab


Link to video used: https://www.youtube.com/watch?v=Knfhm43y8Wg

Link to my attempt at editing: https://www.youtube.com/watch?v=uKoRecaiUUo&feature=youtu.be

This project was a great way for me to get to know new people and have a understanding of other courses and how their mindsets work. Shamefully for this project I was absent for a week due to being stuck in London because of the snow but that didn't stop me from helping. The only thing I wasn't able to attend to was the filming of this project. The team managed to put up the video files for the filming and me and two others on the team decided to give editing a go. I was new to this so my edit wasn't the best but it was still something that was entertaining and a new experience. The reason we didn't end up choosing mine was the over edit I done, which according to people who viewed the video was my biggest downfall in the edit. It's nice to have others edit as well so that we didn't rely just on me to create a good enough edit. Instead we chose to go for the teams version of the edit, making me in this pretty much void as I wasn't there for the filming and they didn't choose my edit. It is still the fact that I was able to help which made me feel part of the team even though the communications between us all were minimal. I was pushed away from the team because of this, but knowing we had another collaboration project coming up for BA2B I didn't let this hold me back, I was still going to attempt to do work for the team even if they didn't want it. Thus the edit. The sound edits/video clips were taken from the teams uploaded files (The original edited file cause the originals were not shared out to all of us).